Subcategories

Recent Posts
-
@RogerCooper
Thanks!
-
Removed https://github.com/triplea-maps/settlers_fallen_empire-08
It's fun to play the Dragonkin and conquer the world.
-
Try something like this:
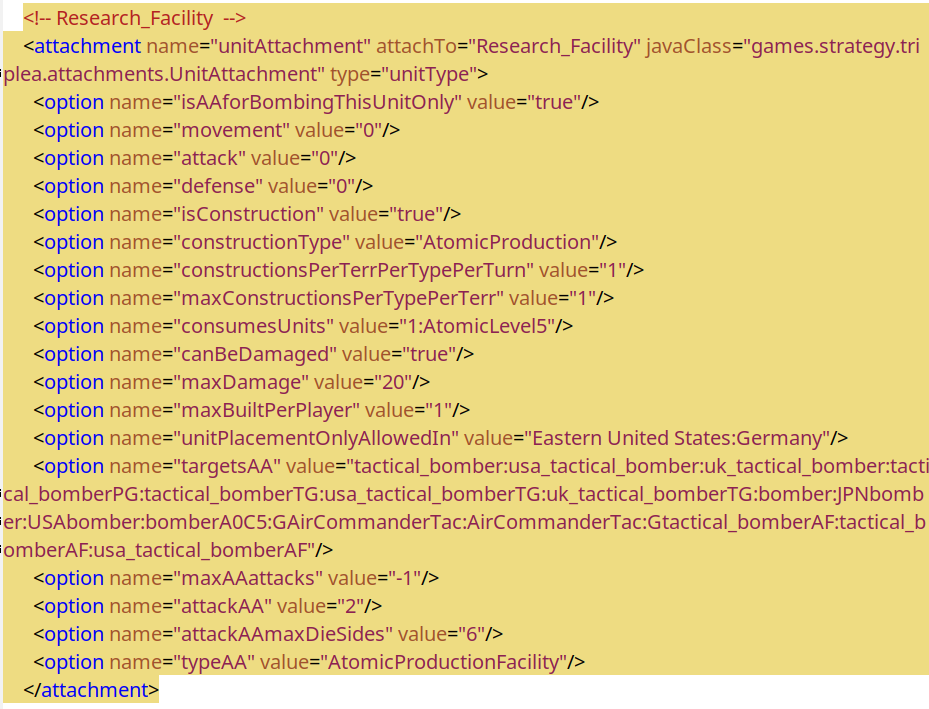
<attachment name="unitAttachment" attachTo="landmine" javaClass="UnitAttachment" type="unitType"> <!-- <option name="defense" value="0"/> removed --> <!-- <option name="attack" value="0"/> removed --> <!-- <option name="isAA" value="true"/> removed --> <!-- Expanding "isAA" values --> <option name="isAAforCombatOnly" value="true"/> <option name="isAAforFlyOverOnly" value="true"/> <option name="typeAA" value="Landmines"/> <option name="attackAA" value="1"/> <option name="maxAAattacks" value="6"/> <option name="targetsAA" value="infantry:tank:cavalry"/> <option name="isInfrastructure" value="true"/> <!-- Changed so units can't be taken as fodder --> <!-- <option name="isFirstStrike" value="true"/> removed --> <option name="isConstruction" value="true"/> <option name="constructionType" value="Landmines"/> <!-- Changed --> <option name="constructionsPerTerrPerTypePerTurn" value="1"/> <option name="maxConstructionsPerTypePerTerr" value="10"/> <!-- The following is added so that mines operate on defense --> <option name="isSuicideOnDefense" value="true"/> <!-- only those units that gets a hit are removed --> <option name="isSuicideOnHit" value="true"/> <!-- Unit can not be captured --> <option name="destroyedWhenCapturedBy" value="BY:$ListOfAllPlayers$"/> </attachment>Also "Units Can Be Destroyed Instead Of Captured" will need to be set.
Cheers...